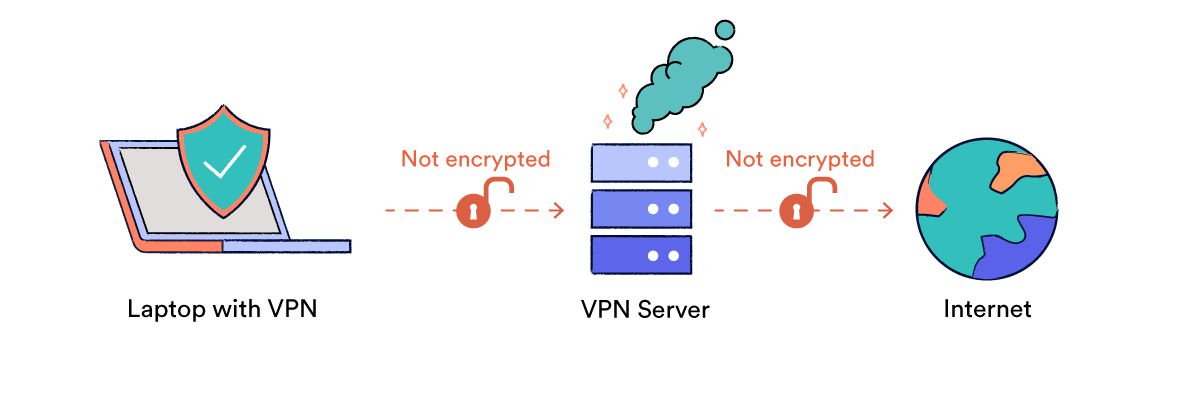
A VPN Kill Switch is a security feature that automatically disconnects your device from the Internet if you lose your VPN connection, and reconnects when your VPN connection is restored. This prevents your public IP address from being accidentally discovered and browsing data being sent over an unsecured Internet connection.
If your VPN connection drops unexpectedly, your VPN Kill Switch should activate and prevent your device from connecting to the Internet . This prevents data from traveling outside the encrypted VPN tunnel. For this reason, VPN Kill Switch systems are an essential security element in any quality VPN service.
Unfortunately, not all services are equipped with a VPN Kill Switch. It’s also a feature that varies greatly depending on the device, VPN protocol, and VPN service you use.
Some VPN Kill Switches are more reliable than others, and others only activate on certain occasions or with certain devices.
You can use our Kill Switch tool to scan your VPN Kill Switch. It is the only tool available capable of analyzing, dating and logging VPN Kill Switch failures.
In this guide, you’ll learn how a VPN Kill Switch works and why it’s vitally important for your VPN to have one . We’ll also look at how to scan your Kill Switch if you suspect it’s not working as it should, as well as which VPNs have the best Kill Switch .
PRO TIP: Private Internet Access achieved the best results in our comprehensive review of VPN Kill Switches. It’s easy to set up, compatible with many devices, and works with all types of VPN disconnections.
Table of Contents
What is a VPN Kill Switch and why do you need it?
VPN Kill Switches vary by VPN service and device. However, its main function is always the same: block your Internet access if your VPN connection fails.
Without this element of protection, you run the risk of your personal data being exposed on the Internet if your connection fails unexpectedly.
To understand why Kill Switches are so important, you need to know how a VPN works to protect your traffic.
This is what happens when you connect to a VPN server:
- When you connect to your chosen VPN server, you can access a website with your browser.
- The VPN client on your device encrypts the information you send and hides it from your Internet Service Provider (ISP).
- The encrypted traffic is sent to the VPN server, where it is assigned a new IP address.
- The VPN decrypts your data and then communicates with the destination website on your behalf.
- The process then continues in reverse, ending with the website information appearing in your browser.
At any point during this process, the VPN connection can suddenly stop, removing encryption from your data and making your real IP address visible to websites you’re visiting.
If you have been connected to the same VPN server for a while, all the browsing information you have used on that server could be traced back to your public IP address. Likewise, from that moment on your web traffic will no longer be encrypted and will be associated with your real IP address .
These are some ways your IP address can be used
- To find your exact location: Your IP address reveals your country, city, your ISP and even your zip code.
- It makes you vulnerable to malicious attacks: Just with the IP address they can launch DDoS (distributed denial of service), “doxing” and “vishing” attacks.
- Cause you to be shown personalized ads: Third parties may send carefully selected advertising content to your specific IP.
A VPN Kill Switch ensures that your IP address and location remain private . We recommend installing a VPN with Kill Switch enabled if you’re concerned about ISP control or what someone might do with your IP address .
How does a VPN Kill Switch work?
This is what happens when your VPN connection fails and you don’t have a Kill Switch enabled:

This is what happens when your VPN connection fails and you have a Kill Switch activated:

The way the Kill Switch protects your data can be divided into four phases:
- Monitoring
The VPN Kill Switch constantly monitors your VPN connection and checks for changes to the network status or your IP address. - Detection
The Kill Switch immediately detects any change or alteration in your VPN connection. - Disconnection
The Kill Switch will respond by blocking your device’s connection to the Internet or specific applications you choose. The answer will vary depending on the type of Kill Switch your VPN provider offers. - Reconnection
When the VPN connection is restored, the VPN Kill Switch is disabled and allows your Internet connection to be reestablished.
The different types of VPN Kill Switch
While all Kill Switches will broadly follow the process mentioned above, how exactly they do this will depend on the type of Kill Switch being used.
And, most importantly, VPN Kill Switches can vary when it comes to when they are activated and how they are applied .
VPN Kill Switches can be activated in two different ways:
- Kill Switch Active: The Kill Switch is activated when it detects a disconnection from the VPN server, blocking your device’s connection to the Internet. This type of Kill Switch does not intervene until it receives the necessary information from the VPN server.
- Passive Kill Switch: Your device’s connection to the Internet is blocked at the exact moment you lose the connection to the VPN server. This type of Kill Switch does not depend on any information from the VPN server to activate.
Active Kill Switches are not as secure as the rest, since there is a certain delay between the moment the VPN disconnects and the moment the Kill Switch receives said information. During this period, your data will not be encrypted or protected and your real IP will be exposed .
Passive Kill Switches are more secure and reliable, as they respond immediately to any change in the network state. Luckily, most VPN providers provide a passive Kill Switch.
- At the system level: Your entire device is locked and cannot access the Internet until the Kill Switch is disabled.
- At the application level: Only selected applications are disconnected from the Internet in case the VPN is disconnected. The rest of your device continues to function normally.
VPN providers usually provide Kill Switches at the system level as they provide more protection. IP leaks are much less likely if the device is disconnected from the Internet completely.
Application-level kill switches can be useful if you use the VPN for something specific. For example, if you are using the VPN to download or upload something, you may want to block only the torrent client.
This gives you greater flexibility, since you can continue browsing calmly while making your torrent traffic safe and anonymous .
What causes a VPN Kill Switch to activate?
Any alteration or change to your VPN connection will cause a VPN Kill Switch to activate and block your Internet connection.
There are many factors that can interrupt your connection to a VPN server. Below we have summarized the main reasons why a VPN disconnects and possible solutions:
1. Weak signal
Solution: Avoid using public Wi-Fi networks.
If your device’s signal is weak or if it loses its Internet connection, your VPN’s Kill Switch will be activated.
To avoid this, do not use unreliable Wi-Fi networks, such as mobile data or public Wi-Fi networks. A strong and stable Internet connection is required to maintain the connection to the VPN.
2. Strict firewall settings
Solution: Whitelist your VPN service.

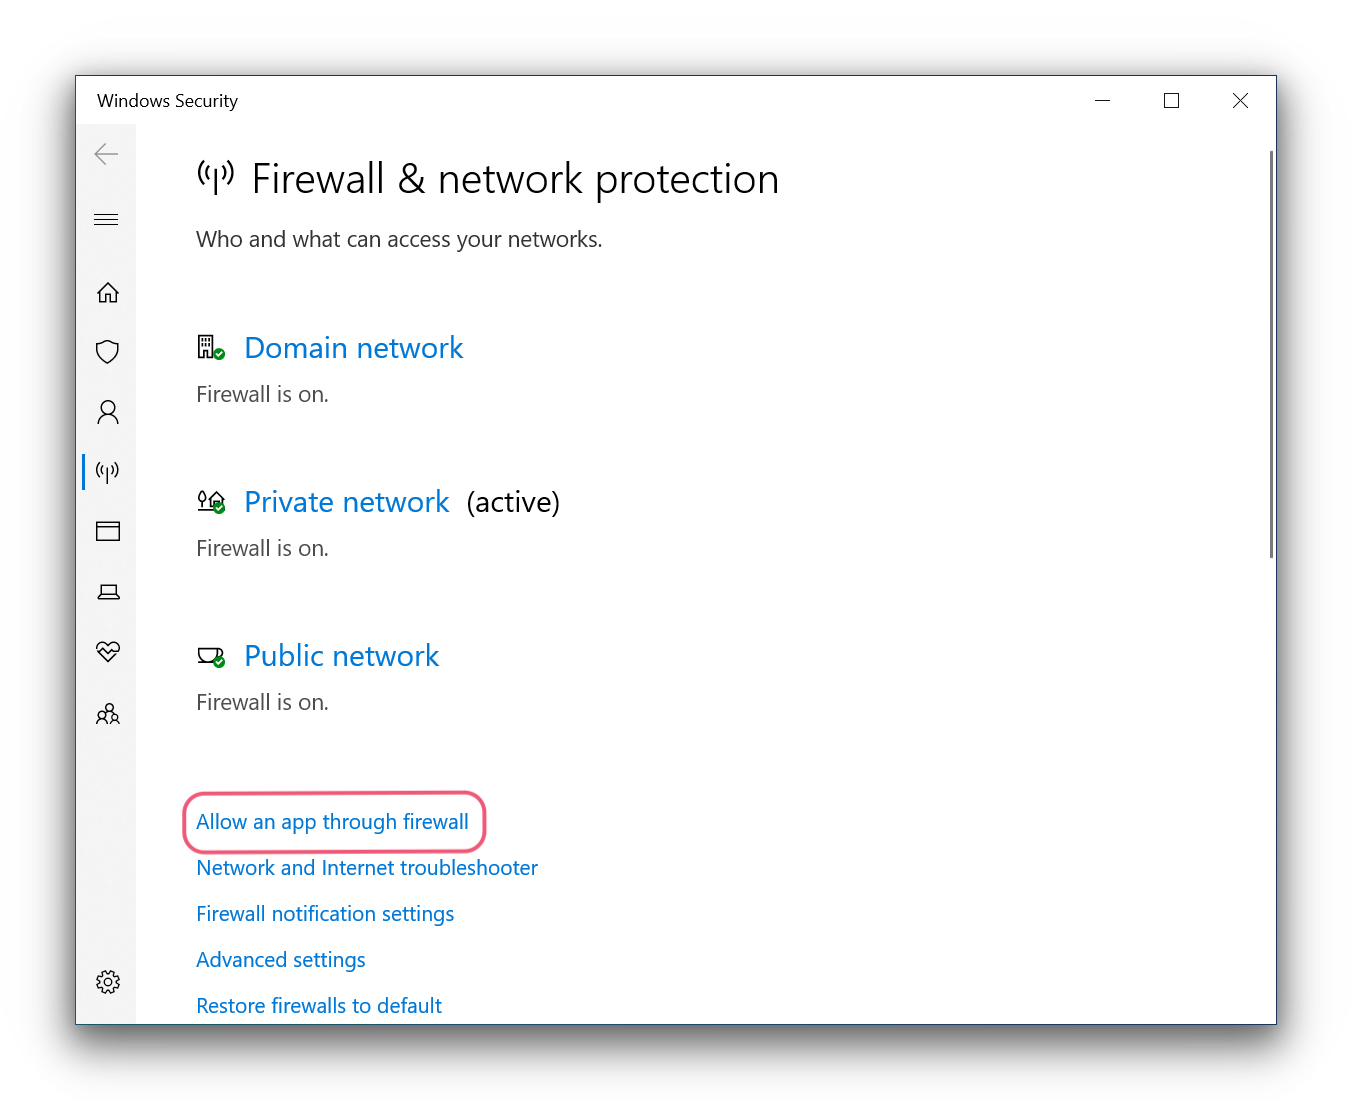
You can change your firewall settings in Windows Security.
Your operating system’s firewall may block or drop your VPN connections, causing the Kill Switch to activate.
It is also possible that any system update will change your firewall settings and prevent VPN connections from being established.
To resolve this, add your VPN service to the firewall’s allowed apps list. This will ensure that your VPN connection bypasses the firewall and is verified for future system updates.
Follow these steps to add your VPN to the Windows Firewall whitelist:
- Click the Windows Start button and open Settings .
- Go to Updates & security > Windows Security > Firewall and network protection > Allow an app through the firewall .
- Next, select Change settings and add the VPN provider.
- If you can’t find your VPN in this list, select Allow another app… > Browse . Find your VPN and click add to confirm the change.
- When you’re done, click OK to save your changes.
Follow these steps to add your VPN to the macOS firewall whitelist:
- Go to System Preferences > Security & Privacy > Firewall .
- If prompted, select the padlock symbol in the bottom left corner and enter your password .
- Press unlock .
- Next, click on Firewall Options and then +.
- Select your VPN and click add .
- When you’re done, click OK to save your changes.
3. Unreliable VPN protocol
Solution: Switch to OpenVPN (TCP)
Any interruption to your Internet or VPN connection can trigger the Kill Switch.
Many VPNs offer OpenVPN (UDP) as the default VPN protocol and it does not provide a very stable connection.
To prevent the Kill Switch from being activated inadvertently, change the VPN Protocol to OpenVPN (TCP) .
The TCP protocol gives you a more stable VPN connection in exchange for a slower download speed.
Also Read: Proxy vs VPN: how are they different?

